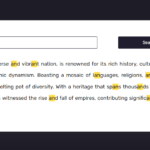
In this tutorial, we’ll create a simple yet powerful Text Truncation Tool using HTML, CSS, and JavaScript. This tool allows users to input a text, specify a truncation length, and then see the truncated output. Additionally, users can copy the truncated text with just one click.
Let’s break down each section of the code for a comprehensive understanding.
HTML Structure:
The HTML structure is the foundation of our Text Truncation Tool. We use a straightforward layout with div elements to organize our content. The essential HTML tags are as follows:
<!DOCTYPE html>
<html lang="en">
  <head>
    <meta name="viewport" content="width=device-width, initial-scale=1.0" />
    <title>Text Truncation Tool</title>

    <link
      href="https://fonts.googleapis.com/css2?family=Rubik:wght@400;600&display=swap"
      rel="stylesheet"
    />
  </head>
  <body>
    <div class="custom-container">
      <div class="custom-txt-areas">
        <div>
          <label for="custom-input-text" class="custom-label"
            >Input Text:</label
          >
          <textarea
            id="custom-input-text"
            rows="5"
            placeholder="Enter Text Here..."
            class="custom-textarea"
          ></textarea>
        </div>
        <div>
          <label for="custom-output-text" class="custom-label"
            >Output Text:</label
          >
          <textarea
            id="custom-output-text"
            rows="5"
            placeholder="Output text will be displayed here..."
            class="custom-textarea"
          ></textarea>
        </div>
      </div>
      <input type="number" value="10" id="custom-len" class="custom-len" />
      <button id="custom-truncate" class="custom-truncate">Truncate</button>
      <button id="custom-copy" class="custom-copy">Copy</button>
    </div>
  </body>
</html>This HTML structure sets the stage for the tool’s functionality. The next steps involve styling the tool with CSS and implementing interactive features using JavaScript.
CSS Styling:
CSS is crucial for creating an aesthetically pleasing and responsive design. Our styles focus on creating a clean, user-friendly interface. Let’s go through the CSS styling section:
* {
  padding: 0;
  margin: 0;
  box-sizing: border-box;
  font-family: "Rubik", sans-serif;
}
body {
  background-color: #1e1c27;
}
.custom-container {
  background-color: #ffffff;
  border-radius: 0.8em;
  width: 95%;
  max-width: 43.75em;
  position: absolute;
  transform: translate(-50%, -50%);
  left: 50%;
  top: 50%;
  padding: 5em 2em;
}
.custom-txt-areas {
  display: grid;
  grid-template-columns: 1fr 1fr;
  gap: 1em;
}
.custom-label {
  color: #02001f;
  font-weight: 600;
}
.custom-txt-areas div {
  display: flex;
  flex-direction: column;
}
.custom-textarea {
  resize: none;
  border: 1px solid #02001f;
  border-radius: 0.3em;
  margin: 1em 0 2em 0;
  padding: 0.8em;
}
.custom-len {
  width: 5em;
  padding: 0.8em 1em;
  border: 1px solid #02001f;
  border-radius: 0.5em;
}
.custom-truncate,
.custom-copy {
  padding: 0.8em 1em;
  border-radius: 0.5em;
  border: none;
  background-color: #1dd2a2;
  cursor: pointer;
}
@media screen and (max-width: 600px) {
  .custom-txt-areas {
    grid-template-columns: 1fr;
  }
}The CSS styles enhance the visual appeal of our Text Truncation Tool, making it more user-friendly. Next, we’ll explore the JavaScript functionality.
JavaScript Functionality:
JavaScript brings our tool to life by handling text truncation and copying. Let’s dissect the JavaScript code:
// Accessing HTML elements using document.getElementById
let customInputText = document.getElementById("custom-input-text");
let customOutputText = document.getElementById("custom-output-text");
let customTruncateBtn = document.getElementById("custom-truncate");
let customCopyBtn = document.getElementById("custom-copy");

// Event listener for the Truncate button
customTruncateBtn.addEventListener("click", () => {
    // Retrieving the truncation length from the input field
    let customLen = parseInt(document.getElementById("custom-len").value);

    // Validating input length and input text
    if (customLen > 0 && customInputText.value.length > customLen) {
        // Truncating and updating the output text
        customOutputText.value = customInputText.value.slice(0, customLen);
    } else {
        // If not valid, keeping the original text
        customOutputText.value = customInputText.value;
    }
});

// Event listener for the Copy button
customCopyBtn.addEventListener("click", () => {
    // Copying the truncated text to the clipboard
    navigator.clipboard.writeText(`${customOutputText.value}`);
});
JavaScript adds interactivity to our tool. It captures user input, truncates the text, and facilitates easy copying. The event listeners ensure that these actions occur seamlessly.
With this breakdown, you now have a comprehensive understanding of how each part of the Text Truncation Tool works. Feel free to customize and expand upon this foundation to suit your specific needs.
Happy coding!

